Are you tired of fumbling for your keys every time you come home? Do you long for the convenience and security of an intercom access system? Look no further!
In this article, we will guide you through the installation process of intercom access systems, step by step. From planning and preparation to troubleshooting and maintenance, we’ve got you covered.
Get ready to experience the ease and peace of mind that comes with having a state-of-the-art intercom system at your fingertips.
Key Takeaways
- Regular maintenance and system checks are crucial for ensuring the smooth operation of intercom systems.
- Establishing a maintenance schedule helps prevent unexpected breakdowns, extends the lifespan of the system, and reduces the risk of costly repairs.
- Routine checks are significant for verifying all components are working correctly, maintaining optimal communication quality, and detecting potential issues early on.
- Identifying signs of wear or damage allows for timely repairs or replacements, prevents further damage to the system, and reduces the risk of security breaches.
Planning and Preparation
Before beginning the installation, it’s important to carefully plan and prepare the necessary materials and tools. Budgeting plays a crucial role in this process, as it allows you to determine how much you can afford to spend on the intercom access system. Conducting a site survey is also essential to ensure that you have a clear understanding of the specific requirements and challenges of the installation location.
During the planning phase, take the time to assess the layout of your property and identify the most suitable areas for installing the intercom access system. Consider factors such as the proximity to entrances, wiring accessibility, and visibility. This will help you determine the optimal placement for the intercom units and other necessary components.
In addition to budgeting and site survey, gather all the materials and tools required for the installation. This may include intercom units, wiring, mounting brackets, screws, and a power supply. Having everything ready beforehand will save you time and ensure a smooth installation process.
Now that you have planned and prepared, it’s time to move on to the next phase: wiring and connectivity. This step involves connecting the intercom units and ensuring they are properly linked to the power supply and any additional devices, such as door locks.
Wiring and Connectivity
To ensure proper functionality, it’s important to properly wire and connect the intercom access system. When it comes to wiring and connectivity, attention to detail is key.
Start by ensuring that you have a reliable power supply for the system. Connect the intercom access system to a power source that can provide a consistent and uninterrupted flow of electricity. This will ensure that the system functions smoothly and is always ready to use.
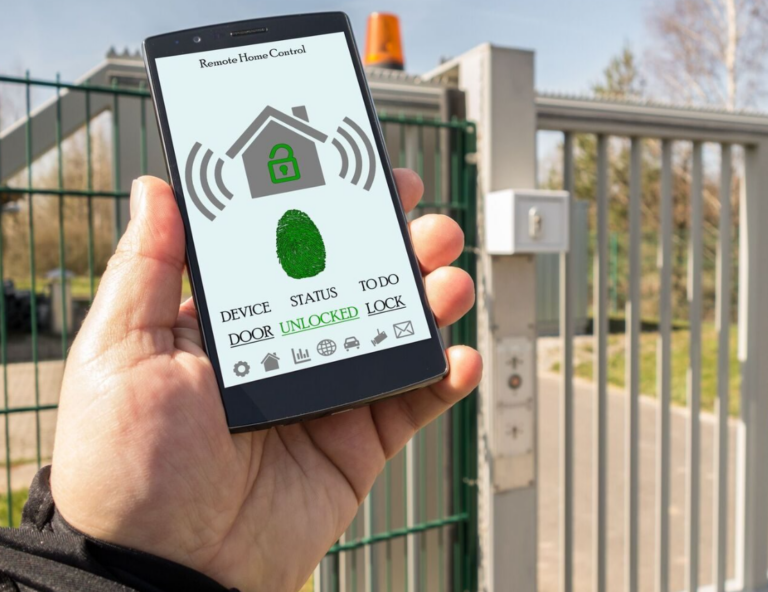
In addition to power supply, network integration is another crucial aspect to consider. Connect the intercom access system to your existing network infrastructure to enable seamless communication and control. This allows you to manage and monitor the system remotely, providing you with greater convenience and peace of mind.
Properly wiring and connecting the intercom access system not only ensures its proper functionality but also enhances its overall performance and reliability. By following the manufacturer’s guidelines and using high-quality cables and connectors, you can create a robust and efficient system that meets all your needs.
Now that you have successfully wired and connected your intercom access system, it’s time to move on to the next step: configuration and setup. In this section, we will explore how to customize the system to your specific requirements and ensure that it operates optimally. So, let’s dive right in and get started!
Configuration and Setup
Once you’ve successfully wired and connected your intercom access system, it’s time to start customizing and setting it up to your specific needs. Configuration and setup are crucial steps in ensuring that your intercom system functions seamlessly and meets all your requirements.
Here are three key aspects to consider:
System Requirements: Before you begin the configuration process, it’s essential to understand the specific requirements of your intercom access system. This includes the number of users, the range of communication, and any additional features you may need. By identifying these requirements, you can tailor the setup to meet your exact specifications.
Software Integration: Many intercom access systems offer software integration, allowing you to manage and control the system remotely. Take advantage of this feature by integrating the intercom system with your existing software or security systems. This integration will enhance the overall functionality and convenience of your intercom access system.
Customization: Every establishment is unique, and your intercom system should reflect that. Take the time to customize the settings and options according to your preferences and operational needs. From personalized greetings to setting up different access levels for users, customization ensures that the intercom system aligns perfectly with your requirements.
With the configuration and setup of your intercom access system complete, the next step is mounting and installation. This phase will involve physically installing the intercom system and ensuring it is positioned correctly for optimal performance.
Mounting and Installation
Now that you’ve completed the configuration and setup of your intercom access system, it’s time to focus on mounting and installing it in the desired location. This step is crucial to ensure seamless functionality and maximum security.
When it comes to mounting, consider a location that provides optimal coverage and visibility. Choose a spot that allows clear communication with visitors and also allows you to monitor the surroundings effectively.
Before you start the installation, make sure you have a solid plan in place to manage the cables. Proper cable management is essential to maintain a clean and organized appearance, as well as to prevent any potential damage to the system. Use cable clips or conduits to secure and route the cables neatly, ensuring they are out of sight and protected from any potential hazards.
Next, ensure a stable power supply for your intercom access system. Connect it to a reliable power source, preferably a dedicated circuit to avoid any electrical interference. Make sure to follow the manufacturer’s instructions regarding voltage requirements and proper grounding.
With the mounting and power supply in place, you’re one step closer to enjoying the convenience and security your intercom access system provides. But before we dive into troubleshooting and maintenance, let’s ensure a smooth transition by addressing some common installation concerns.
Troubleshooting and Maintenance
When it comes to troubleshooting and maintenance of your intercom access system, it’s important to have a clear understanding of the common installation issues that may arise.
By identifying and resolving these issues promptly, you can ensure that your system runs smoothly and efficiently.
Regular maintenance and system checks are also crucial in order to prevent any potential problems and keep your system in optimal condition.
However, if you encounter complex issues that you are unsure how to resolve, seeking professional help is always a wise decision to avoid further complications.
Identifying and resolving common installation issues
To identify and resolve common installation issues with intercom access systems, there are a few steps you can take.
First, double-check all the connections and make sure they are properly secured. This includes examining the network cables and connections between the intercom units and the main control panel. Ensure that they are securely plugged in and not damaged.
If you are still experiencing connectivity problems, troubleshooting the network settings on the control panel may help. Try resetting the network settings and see if that resolves the issue.
In addition to connectivity issues, power supply problems can also cause installation issues. Make sure that all power cables are properly connected and that there is a stable power source. If the system still doesn’t power on, it may be worth checking the circuit breaker or contacting a professional for assistance.
Regular maintenance and system checks
Regularly checking and maintaining your intercom system is essential for ensuring its continued smooth operation. By establishing a maintenance schedule, you can effectively monitor the performance of your system and prevent any potential issues from arising.
It is important to conduct routine checks to ensure that all components are functioning properly and to identify any signs of wear or damage. Additionally, consider investing in equipment upgrades to enhance the functionality and security of your intercom system. Upgrading to newer technologies can provide advanced features and improved communication capabilities.
However, keep in mind that seeking professional help for complex problems is sometimes necessary. If you encounter any issues that go beyond your expertise, don’t hesitate to contact a qualified technician who can diagnose and resolve the problem efficiently.
Seeking professional help for complex problems
If you’re unsure about how to troubleshoot complex issues with your intercom system, don’t hesitate to reach out to a qualified technician for assistance. They can provide the expert guidance and technical assistance you need to get your system up and running smoothly again.
Trying to fix these problems on your own can be frustrating and time-consuming, not to mention potentially damaging to your system. By seeking professional help, you can save yourself the stress and ensure that the issue is resolved correctly.
A qualified technician will have the knowledge and experience to diagnose the problem accurately and provide a solution that meets your needs. So, don’t hesitate to reach out and get the help you need to keep your intercom system functioning at its best.
Conclusion
So now you understand the installation process of intercom access systems. With careful planning and preparation, you can ensure a smooth and efficient installation.
By properly wiring and establishing connectivity, you’ll have a reliable system in place. Configuration and setup are crucial to customize the system to your specific needs.
Mounting and installation require precision and attention to detail. And don’t forget about troubleshooting and maintenance to keep your system running smoothly.
Now, ask yourself, isn’t it time to upgrade your security with an intercom access system?